Featured Products
Show Them the Speed of Light Using a Chocolate Bar!
If you have the typical classroom, your students will be a little extra distracted this February 14th for Valentine's Day. We found a fun way to capture their attention on this sweetie-filled holiday and still teach a little physics in the process. In particular, you can show them a new and fun way to remember the all-important speed of light calculation that is important in all wave-based equations. All you need is a microwave, some chocolate bars, a ruler, and possibly a calculator (depending on how much chalkboard space you have).
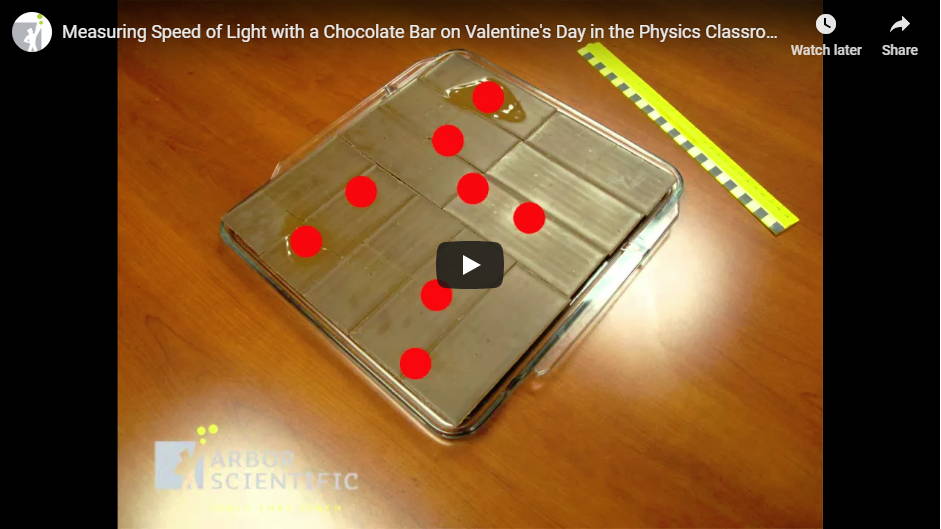
Tip: We found that the action of the microwaves bouncing around inside the oven made it difficult to predict where the melted spots would show up. To offset this, we used a full 12-pack of small bars that covered most of the microwave bottom. See the video for a demonstration of this. Fortunately, for the students at least, this will probably also give you enough chocolate for everyone in the class.
First, identify the key equation we will use, the speed of light:
c = λƒ OR Speed of light = Wavelength * Frequency
Next, look at the frequency of your microwave. Most standard microwaves have a frequency of 2.45 GHz, but the exact specifications will usually be listed in the manual or on the microwave itself.
Tip: If you have a revolving plate in the microwave, take it out and make sure the chocolate bar is not spinning. That plate is actually meant to counter the very effects we are trying to demonstrate!
Now, use the microwave to cook the chocolate until the first signs of melting appear. This will vary depending on the power of your microwave, but our old microwave with a power of 900W took about 30-40 seconds to reach this point.
As microwaves(that would be the actual "micro" wave, not the microwave oven you are cooking with) travelthrough a piece of chocolate, they melt certain parts and do not melt other parts. The melted spots will appear at the top (crest) and bottom (trough) of the wave and provide you with half the wavelength. Measure the distance between the center of any two melted spots, then multiply your results by two to get the full wavelength.
Why do the melted spots appear in specific location?
The generated microwaves set up a standing wave pattern, one that remains in a constant position, in the oven where the overlapping reflected waves meet oncoming waves. At each of the two melted areas, the waves add constructively with one melted area formed by the wave crests from one direction adding to wave crests from the opposite direction and the next melted area is formed where wave troughs are adding together. In between these two areas, waves are crossing out of phase with crests and troughs, cancelling each other out. Since one melted area is produced by wave crests adding followed by the corresponding wave troughs adding, and we know that this only forms half of the wavelength, you have to multiply by two to get the full wavelength.
With a standard 2.45GHz microwave, the distance between melted spots should be around 2.4 inches (6.1cm). Note that you may have multiple pairs of spots, especially if you cover the full surface of the bottom of the microwave. Due to the microwaves bouncing off walls and crossing paths, there may be cases where the spots aren't the correct length. This is why we recommend covering the entire bottom surface of the microwave. If you use a standard size microwave, you should have enough pairs of melted spots that reveal the proper width. In this experiment, we have to assume that we already know that the wavelength is uniform for any one type of wave. Given this uniformity, and if you have at least 3 or 4 pairs, you can deduce which melted spots pair up, since there is only one length possible. Based on the wave equation, your final calculation of the speed of light should be in the vicinity of 186,000 miles/s or 3x10^8 m/s.
About microwaves:
Microwaves, much like light waves, are a form of electromagnetic radiation. All electromagnetic waves travel at light speed. Saying that your microwave oven has a frequency of 2.45 gigahertz means that they bounce up and down 2.45 billion times every second as they travel across the oven and through the chocolate bar.
So at this point, you have all of the information you need, wavelength (6.1cm * 2 = 12.2cm * .01cm/m = .122m) and frequency (2.45 GHz), to calculate the speed of light. The actual calculation:
Speed of light = 0.122m X 2,450,000,000 Hz = 298,900,000 m/s
The actual speed of light is 299,792,458 m/s, so this highlights the difficulty in getting exact measurements. But this is fairly accurate for something done in a household appliance. It is also something that physicists spent almost half a century trying to measure, and you just measured it right there in your own classroom!
We certainly didn't invent this experiment ourselves, as it has likely been around since the first microwave ovens were sold. But we've tried to put it into a format that is classroom and Valentine's Day friendly, and we hope that it can help you turn this fun holiday into a great learning experience.


